The time has come for a battery cable replacement. How do you begin? What can you do to successfully and effectively replace your battery cables? We have the information you need now!
⚠️ If It's Broken, Don't Fix It - Get Paid Cash for Your Vehicle ⚠️

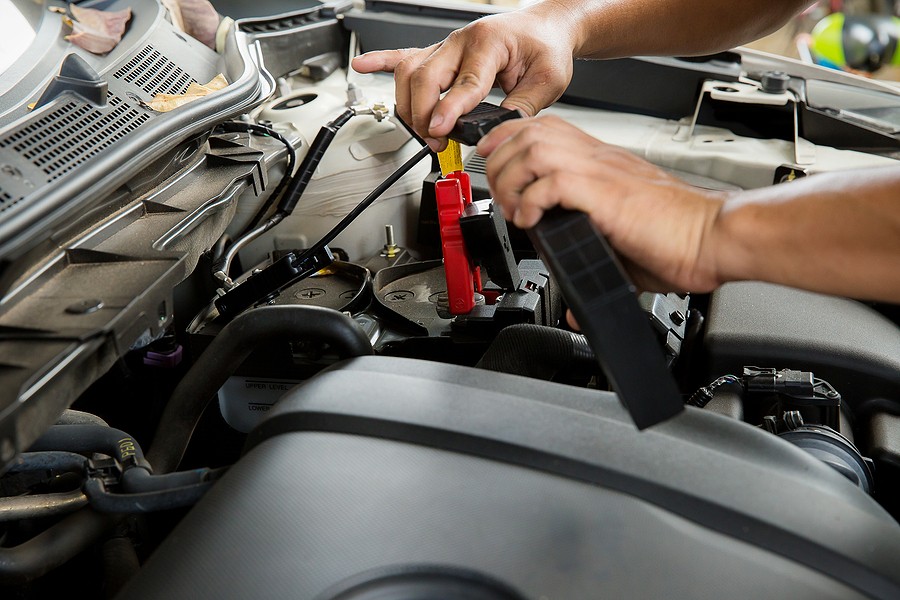
Which Cable Goes First On The Battery?
When placing cables on a battery, you want to connect the positive first, then the negative. Once you disconnect your cables from the old battery, you want to make sure that you disconnect the negative first, then the positive. When you desire to connect the new battery, you want to go in reverse order-first you connect the positive, then the negative.
How Do I Know What Size Battery Cable To Buy?
There are a few aspects of battery cable purchasing that you want to pay attention to. Those two aspects are as follows:
Gauge
A battery cable with the incorrect gauge is one of the most common issues when it comes to improper battery cable installations. Did you know that choose the incorrect gauge can lead to great risks than you may realize? A wire gauge that is too large or thick can prevent the proper and correct current distribution. On the other hand, if you buy a thin wire gauge you run the risk of a short-circuit. In the most extreme cases, that desperately thin wire can cause a fire in the engine’s compartment.

Wire Length
Another key factor in buying the correct battery cable is the consideration of wire length. As you choose the wire length, you want to think about voltage drop. In other words, you want to think about the voltage that is lost throughout the length of the auto cable or wire. When the wire length gets longer there is an electrical resistance that builds up, till it forces the voltage down to a level that is usable level.
Strand Count
Another important aspect to think about in choosing battery cables, is the strand count of the component. Remember that stranded conductors are arranged by the usage of numerous metal strands that are grouped together in an array of configurations. They also produce far more flexibility, than solid conductors. You may want to keep the following in mind: the higher your strand count, the more flexibility your battery cable will be.
What Else Should I Keep in Mind During Battery Cable Replacement?
After you’ve chosen the battery cable that has the correct specs for your battery cable application, you want to take the time for a secure connection to the battery terminal. A bad or unsecure connection can compromise the performance of your entire battery system. In fact, this is the leading cause of lots of meltdowns with the battery terminal post. With the correct size cable, careful assembly and stellar upkeep, you will minimize the potential for issues. Many times, folks don’t realize the importance of great maintenance. It’s often overlooked but is one of the simplest ways to ensure healthy cable connectivity. Since the objective is to avoid corroded terminals, you want to take the time to periodically inspect the battery cables ensuring that they aren’t fractured or cracked. You also want to be sure that you have clean posts. If there is any dirt or debris, you ant to remove it ASAP. Don’t forget to ensure that your lugs are secured tightly to the battery posts. You also want to do a check of your vent caps.
What is the Cost of New Battery Cable Replacement?
If you decide to take your car to a mechanic, then you can count on spending between $260 and $300 for an average battery cable replacement job. The labor for the task can be about $100 with the rest of the cost coming from the parts. Of course, your final cost will depend on where you go, as well as the make and model of your particular vehicle.
How Long Do Battery Cables Last?
Generally, a battery cable can last anywhere from 50,000 miles, and up to 100,000 miles. The battery cables within your car do get quite a workout. Because of the amount of usage, it’s easy for wear and tear to set it. Typically, when a battery cable endures damage, the cable will not be able to be repaired-a replacement is needed. In fact, the only way to ensure that the issues are kept at bay, is to replace your battery cables. You want to have a battery cable that is both properly tested with a voltage meter, a well as properly installed. You cannot start your car, unless you have the correct and proper battery cables.
In many instances, you can repair battery cables if minimal corrosion is the issue. Of course, corrosion is a huge culprit that can prohibit the cables from getting a solid connection to your vehicle’s battery posts. Once repairs are needed to the battery cables you may notice things such as:
- Your car failing to start, because of a bad connection.
- You will hear a clicking noise as you try to start your car.
- An array of electrical components located in the cab will fail to work.
- You have to move, wiggle or rig your battery cable, in order to create good connection with the battery.
- You can see damage to the battery cable.
Having the battery cables inspected by a professional auto tech or mechanic is the surest way to have battery cable replacement and repair done correctly-the first time. Trying to operate a vehicle with lose, cracked, damaged or frayed battery cables can create a tremendous instability that will lead you to an inoperable vehicle.
OK- What Are The Steps in Successful DIY Battery Cable Replacement?
As battery cables are generally inexpensive, it is always recommended to replace them after you have noted that they are worn out or just plain corroded or worn out. Check out this guide below that will help you evaluate, remove old battery cables, while successfully installing new ones.
What Tools Are Needed?
The following tools and materials are needed:
- One set of hand tools
- Battery cleaner
- One battery cleaning tool
- One set of heavy-duty diagonal cutters
- Once set of replacement battery cables
Now you can follow the steps outlined below for successful battery cable replacement:
First Step
Give a thorough examination to your battery’s components. As you look at the old cables that you will be replacing, you want to pay attention to the negative as well as the positive cables. Trace them all the way from the battery terminals to the locaiotn of the connection on the vehicle.
Second Step
Now you can carefully remove the negative battery terminal. As you disconnect any automotive battery you want to FIRST remove the negative terminal. Removing the negative terminal helps to remove the ground connection from the vehicle’s electrical system. Removal of the negative terminal also help to eliminate the possibility of any electrical shocks or shorts. You can generally identify the negative battery terminal by a black-colored battery cable, or by a negative sign that you see on the terminal. Then disconnect the negative terminal and place the cable out of your way.
Third Step
Proceed with removing the positive terminal in the same fashion and form that you removed the negative terminal.
Fourth Step
After both of the cables have been disconnected, now is the time for you to remove any securing mechanism or component that may be at the top or the base of your car battery. After that task is complete, you now want to remove the battery from the engine bay. Proceed on with removing disconnecting the battery cables. You can follow both battery cables toward their connection to your vehicle, and continue on with disconnecting both of them.
Fifth Step
You can now compare your current cables alongside your replacement cables. When the cables are removed, look at them compared to your replacement cables ensuring that they are the correct replacements. If not, then you need to stop here in the process and obtain the correct replacement parts. Are your cables of an adequate length? Do they have terminal ends that are matching? If you are using universal cables, then you want to stop and carefully trim the cables to the correct length with your diagonal cutters. Keep in mind that you want to carefully examine both terminals and replace them with compatible should you have to.
Six Step
After you have verified that the replacement battery cables will be ideal, and work with your particular vehicle, you can continue on with installing them in the same fashion that you removed the old ones.
As you bolt them down, you want to ensure that the contact surfaces are free of debris and dirt- as well as any corrosion. Remember: Do NOT over-torque your bolt. Follow up with securing both cables to the car, but DON’T connect them to the car battery just yet.
Seventh Step
You can now use both of your hands, to carefully insert your vehicle battery back into the engine bay for reinstallation.
Eighth Step
After you have installed your vehicle battery, you can now continue with cleaning both battery terminals with your battery terminal cleaner and even a steel brush. Give those terminals a thorough cleaning, paying attention to any corrosion that may be there.
Ninth Step
Now, you can reinstall your battery cables, after you have removed any corrosion from the terminals and cleaned them. Be sure that you reinstall your battery cables to your respective and correct posts. Be sure that you install your positive battery cable first- then follow with the negative.
Tenth Step
Now that installation is complete, it’s time to test your vehicle. To test your DIY battery cable replacement efforts, Turn the car key to the “on” position, ensuring you have sufficient power. Start your car and make sure that everything is in working order.
Do You Have Any Related Content About Battery Cable Replacement I Can Read?
Of course! Check out the following articles below! Just click on the title and read related content about battery cable replacement that can enrich your DIY experience!