You are driving down a dark deserted highway at night. A car passes you and blinks its lights, then another driver does the same thing. You hear the sound of sirens and you pull over. The cop tells you that one of your tail lights is out. As he writes you a ticket, you wonder how much all of this is gonna cost you. Much of it will depend upon what kind of car you have. How many lights you need to replace is also important.
⚠️ If It's Broken, Don't Fix It - Get Paid Cash for Your Vehicle ⚠️

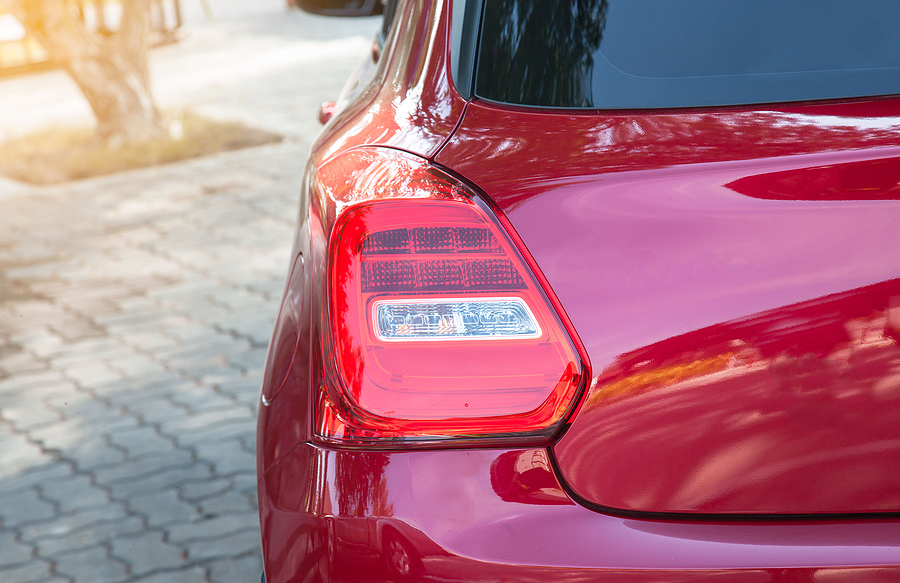
Tail Light Replacement Cost
If a bulb goes out on your tail light, it will cost around $20 to replace. If the assembly needs to be replaced costs vary greatly. If you go to a dealership or auto body shop for your new tail light assembly, you will pay anywhere between $200 to $2000 for each assembly. If you have a luxury car, you will pay even more than that. If you do it yourself, you can get the cost down to a price range of $30 to $250 per assembly.
Common Tail Light Problems
There is a wire inside the bulb that creates light that is called the filament. One way to pinpoint a bad bulb is to take it out of the socket into which it is plugged and examine the filament. If the filament is broken you will have to replace the bulb.

If you change the bulb and it does not work, there may be one of several things wrong with the assembly.
A Bad Fuse
The fuse box is the first thing you want to check for when any electrical component is not working. A fuse is a piece of metal inside a plastic casing. When the current flowing through it is too high, it will break. It can actually be a good thing when it breaks because it protects the other components of the electrical system from damage. There are a couple of different places where a fuse box may be located.
You will first want to look in the main fuse box that you will find under the hood. You will see a black box that has a lot of wires attached to it. Simply take off the cover to access the fuses inside.
The second place you should look is inside the cabin of the vehicle. It tends to be on the front passengers' side. You should look behind a plastic panel that you will find underneath the dash. In some automobiles, you will have to open the passenger door all the way to find it.
Bad tail light fuse
Each fuse is attached to an electrical component. You will find where each fuse goes and what it does when you remove the covering to get to the fuse. You should also find this information in your owner's manual. You can also lookup a year, make, model, or a specific diagram online.
When you locate the fuse that operates the car’s tail lights, you can test it with an automotive circuit tester. The tester will light up if the fuse is good. If it doesn’t light up, the fuse should be replaced with an identical fuse it should have the same amperage. There are some fuses where you can see a break in the metal wire when the fuse is bad.
Faulty Tail Light Bulbs
If the fuses are operational, you will want to examine the tail lamp bulbs themselves. You are likely to have to take out the tail light cover. However, some vehicles have an access panel. If this is the case, simply twist the bulb out of the lens.
Socket Failure
Occasionally your vehicle’s sockets may fail. If a bulb is plucked into a failed socket it won’t work. Moisture entering the socket can cause a socket to fail. A socket may also fail if it is wired improperly.
If the bulb and fuse both look okay, you will want to take the bulb out and examine the socket. If the socket is discolored or if the pins are broken or bent, the socket is probably bad.
You can also check the electrical current at the socket with a multimeter. If there is not any electricity reaching the pins, your car may have a major electrical problem.
Dilapidated Wiring
If electricity is not being transmitted to the socket, and fuses are all in working condition, there may be a damaged or broken wire somewhere along the line. This is the point where things can get rather involved and you may want to take your car into a professional mechanic.
If you decide to continue examining the car yourself, you will need to get a wiring diagram. You will want to make sure the wires do not have cracked or broken casings.
You will want to examine the ground strap as well. The ground strap is the thick black wire that attaches to the battery’s negative terminal to the chassis of the vehicle. A damaged ground strap will not be able to deliver electricity to the sockets very well.
Control Switch Failure
Taillights might also fail because the switch on the dash that operates them is faulty. If the wires check out properly, you will want to examine the control switch.
The same switch generally turns on headlights, parking lights, and tail lights. You will need to pull the switch out from the dash and test it with a multimeter to see if it is working.
A Bad Ambient Light Sensor
Contemporary vehicles have an ambient light sensor that can be found on the dash. This lets the car’s computer adjust the luminosity of the headlights and tail lights based on how light or dark it is outside.
Some ambient light sensors also switch off daytime running lights. If your brake lights turn on but your parking lights and headlights do not, there may be something wrong with the ambient light sensor.
When this sensor is corrupted or dirty, it does not sense if it is light or dark outside, so it will not turn on the lights at all. If the headlights work when you manually turn them on, you are almost sure to have a problem with the ambient sensor.
Looking for the cause of electrical failure can be challenging. However, tail light bulbs normally have their own circuit, so the problem can be identified quickly.
Remember that brake lights and tail lights tend to work on different circuits.
When tail lights are not working, you should have them fixed right away, they are a critical component of your car’s safety system.
If you want to replace the tail lights yourself, you will need certain tools and a little bit of time.
Tools Needed to Replace a Tail Light Assembly
The tools you will need for tail light replacement will depend on your car. You will want to consult your owners manual or Google your car and “tail light assembly replacement for details. However, you will always need screwdrivers, ratchet, and safety glasses.
Should You Do the Job Yourself?
Taillight replacement takes some time but it is one of the easier kinds of auto repair you can do yourself. If you should make a mistake it should be easier to fix than if you attempted to fix your brakes yourself. However, if you do it incorrectly it can hurt your vehicle. Safety precautions are important because you can hurt yourself as you are working with electronic wiring.
Steps for Replacing a Tail Light
Before you begin consult your owner’s manual. You may need to remove the rear bumper to get to the tail light.
A traditional tail light assembly will use mini bulbs. You should bear in mind that each vehicle is unique. It is important to review the specs of your vehicle and know that this is just a general guideline.
How to Take out a Tail Light Assembly
- Don the safety glasses before you do anything.
- Disconnect the negative battery cable.
- If you need to take off the rear bumper do so. You may need both kinds of screwdrivers for this. When you get the bumper off you should be able to get a clear view of the tail light assembly.
- Detach the bolts and screws that are holding the assembly in place.
- Pull the assembly out of the car. If there are retainer clips holding the assembly in place, exercise extreme caution as you detach the assembly from the clips.
- Detach the electrical attachments from the back of the assembly.
- If your replacement tail light assembly does not come with new bulbs, you will need to take out the old bulbs and sockets and set them aside so you can reuse them. In most cars, you will have to turn the bulb socket counterclockwise to detach it from the tail light assembly.
How to Install The New Tail Light Assembly
- Make sure the new tail light assembly is identical to the old one.
- Put the bulbs and sockets back in if necessary.
- Reconnect the electrical attachments.
- Mount the tail light assembly. It should slide into the retainer clips that are attached to the rear of the vehicle.
- Reattach the tail light assembly bolts or nuts. Tighten them until they are secure, but don’t overtighten them. The factory repair information should give specifications on how tight they should be. It is advisable to use a torque wrench.
- Reattach the rear bumper or interior trim panel if it is necessary.
- Reconnect the negative battery cable.
Tail lights are comprised of plastic which is not that sturdy. Take plenty of time and care when replacing these components.
If all this seems too much for you, remember that you can always just take your car to a professional for repair. If you decide to do this, you will have a couple of options for where to go for the repair.
Taking Your Car to an Auto Body Shop
Most people feel that auto body shops are the best option for repairs. They cost less than mechanics at a dealership and you can talk to them directly.
You should ask them if they are certified in your type of vehicle and get a written estimate from them. Check them out on the Better Business Bureau website and make sure they do not have any complaints against them.
Taking Your Car to the Dealership
You can always take your vehicle to the dealership for repairs. They may be more expensive than other mechanics, but they will be well trained in your make and model of car. Again, tail light assemblies vary from vehicle to car, and they are delicate, so it may be beneficial to go to a dealership in this case. They will also have all the necessary parts on hand which can mean less waiting time for you.
No one would ever get rid of their automobile just because of a broken tail light. However, if many things are wrong with your car, or if it is just old, you may want to consider selling it. You will have a couple of options there as well.
You can sell your vehicle online, but if you do that, you will have to pay for the listing and it may take months. You can use your car as a trade-in when you buy your new car, but they are unlikely to give you a lot of money for it.
Sell Your Car to Us
No one can give you a better deal on your car than Cash Cars Buyers. Our system is simple. Just fill out our form and we will call you back with an offer. We will need your contact information and the make, model, year, mileage, and VIN number of your vehicle.
If you accept the offer we make you, we will make an appointment with you to come and get your car. We will pay you in cash and tow the car away for free.